In October 2017 Microsoft announced the general availability of SQL Server 2017 for Windows, Linux and Docker. And since I started to play around with Docker I thought it’s a good idea to setup my next development environment for SQL Server on Docker?
Why? Because Docker provides the ability to package and run an application in a loosely isolated environment called a container. And a Docker container is much more lightweight than a Virtual Machine, because it doesn’t need an extra Operating System, it runs directly within the host machine’s kernel.
If you want to learn more about Docker itself, please have a look here: https://docs.docker.com/engine/docker-overview/
Let’s get started
Since I run Windows 10 on my developer machine it need to setup SQL Server in a Windows Docker container and I figured out, that there some pitfalls that I came along. So I though it’s maybe benefitial to write a Step by step setup guide.
Step 1: Download and Setup Docker for Windows
To get started we need to download and install Docker first on our machine. You can find the Windows setup here: https://www.docker.com/docker-windows
And there is also a very nice setup guide you can find here: https://docs.docker.com/docker-for-windows/install/. After your setup I would recommend to test if everything works fine. Just follow these examples and run your “Hello World” on Docker.
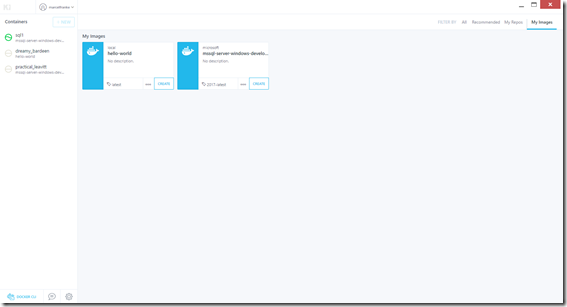
Additionally I would recommend to install Kitematic, a simple and powerful graphical user interface to manage your Docker environment.
Step 2: Setup Docker for Windows containers
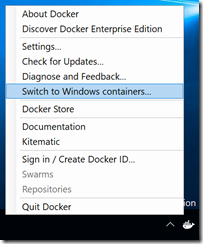
After installing Docker on your machine Docker will start automatically in the background. As per default, Docker runs with Linux containers and you have to switch to Windows containers first. This is very is, just right click on your Docker icon in the taskbar and select “Switch to Windows containers”.
Step 3: Get your SQL Server container image
After we performed the basic setup steps, we now need to get the SQL Server docker image. There are two sources available to get preconfigured images:
- Docker Store: The store is for publishers, that want to sell and distribute docker content (more details).
- Docker Hub: The hub is a cloud-based image registry to link to publishers own code repositories (more details).
Microsoft made SQL Server available in the Store and in the Hub:
- SQL Server in Docker Store:
- Linux Developer Edition: https://store.docker.com/images/mssql-server-linux
- Windows Express Edition: https://store.docker.com/images/mssql-server-windows-express
- SQL Server in Docker Hub:
- Linux Edition: https://hub.docker.com/r/microsoft/mssql-server-linux/
- Windows Developer Edition: https://hub.docker.com/r/microsoft/mssql-server-windows-developer/
- Windows Express Edition: https://hub.docker.com/r/microsoft/mssql-server-windows-express/
I will continue with the SQL Server 2017 Developer Edition for Windows. In order to download the image run the following command in Powershell oder the Commandline.
docker pull microsoft/mssql-server-windows-developer:2017-latest
This will download the latest version of SQL Server 2017. This step can take a while, depending on your internet connection.
Step 4: Start your SQL Server image
After your image download has been completed you can start your SQL Server image with the following command:
docker run -d –p <Port> –name <FriendlyName> -e sa_password=<Password> -e ACCEPT_EULA=Y microsoft/mssql-server-windows-developer:2017-latest
For example you can run it like this:
docker run -d -p 1433:1433 --name sql1 -e sa_password=SecurePassword -e ACCEPT_EULA=Y microsoft/mssql-server-windows-developer:2017-latest
In this case, the image will have a friendly name “sql1” and SQL Server will run on port 1433.
For more details please have a look here: https://hub.docker.com/r/microsoft/mssql-server-windows-developer/
Step 5: Test your connection with sqlcmd
In order to test if the image works fine, connect with sqlcmd and run a short sql query. To connect with sqlcmd you can run the following command in your command line:
sqlcmd -U sa –S <YourIP>,<Port>
In order to figure the IP address of your Docker image you can run:
docker inspect --format '{{.NetworkSettings.Networks.nat.IPAddress}}' <ImageName>
For example
docker inspect --format '{{.NetworkSettings.Networks.nat.IPAddress}}' sql1
Within sqlcmd run a small SQL statement like:
select @@version;
GO;
Step 6: Create a SQL Server Login
Now that you can connect with your SQL Server I would recommend to create a login instead of using the SA account. You can do this also with sqlcmd:
create login <LOGIN> with password=’<PWD>’;
GO;
add to a role EXEC master..sp_addsrvrolemember @loginame = N'<LOGIN>', @rolename = N'sysadmin';
GO;
Step 7: Connect with SQL Server Management Studio
When you can connect with sqlcmd you can of course also use SQL Server Management Studio to connect to your SQL instance. You can find the latest version of SQL Server Management Studio here: https://docs.microsoft.com/en-us/sql/ssms/download-sql-server-management-studio-ssms
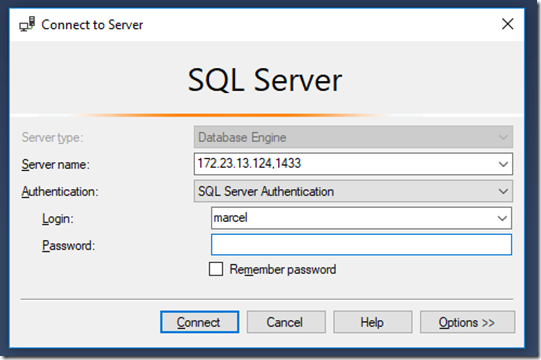
Start SSMS and then connect to SQL Server as you would also do it with a normal local machine:
Step 8: Download and install sample Database AdventureWorks
Very good now we are able to use our SQL Server environement as we are normally used to it. But it makes for fun, if we would have at least some data to play with. Let’s get AdventureWorks and install it on our Docker image.
AdventureWorks is a sample database that you can download here.
In my case I downloaded the AdventureWorks Data Warehouse backup file.
Next we need to get the backup into our image. To do so you have to first stop your image and then run the following command:
docker cp <LocalFolder>\AdventureWorksDW2017.bak <ImageName>:<ImageFolder>\AdventureWorksDW2017.bak
In my case:
docker cp C:\download\AdventureWorksDW2017.bak sql1:C:\AdventureWorksDW2017.bak
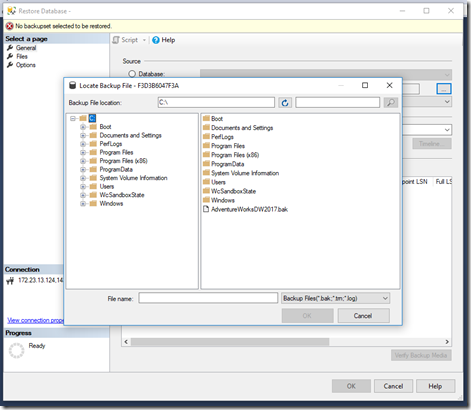
Start your image again, get your new IP-Address and connect with SQL Server Management Studio. Then restore your database from your backup file and you are good to go.
Step 9: Query some data and have fun
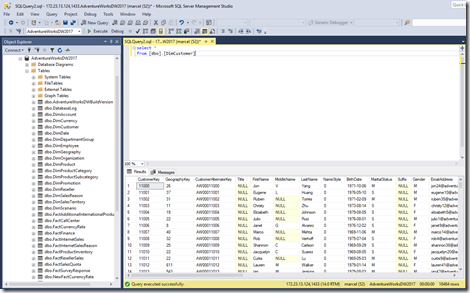
The last step is the easiest one. Just fire some SQL queries in your Management Studio.
December 20, 2017 at 7:00 pm
Thanks a lot for this blog.
STEP 5 and onwards: Pls. note, that this ONLY works, if you use CLR, it does NOT work with Powershell, as invoke-sqlcmd has different parameters than the sqlcmd “command” itself.
mfg Klaus